_svg.png)
_svg.png)
_svg.png)
Basic tasks in Excel
Excel is a very effective tool for making sense of massive volumes of data. However, it also performs admirably when used to track virtually any type of information and do basic computations. The cell grid holds the key to realizing all of that potential. Formulas, text, and numbers can all be found in cells. Data is entered into cells, which are then arranged in rows and columns. You can then sum up your data, sort and filter it, organize it in tables, and create stunning charts. Let's go over the fundamental procedures to get you going.
Create A New Workbook
Workbooks are Excel documents. Each workbook contains sheets, sometimes known as spreadsheets. To keep your data organized, you may add as many sheets as you like to a workbook or make new workbooks from scratch.
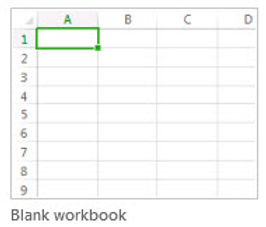
1. After selecting File, click New.
2. Select the Blank worksheet under New.
Enter Your Data
1. Select a blank cell.
Consider the A1 cell on a fresh sheet. Since cells are identified on a sheet by the row and column in which they are found, cell A1 is in the first row of column A.
2. In the cell, type text or a number.
3. To advance to the following cell, press Enter or Tab.
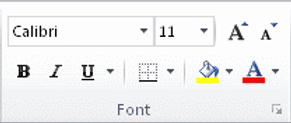
Apply Cell Borders
1. Choose the cell or range of cells to which a border should be added.
2. Click the arrow next to Borders in the Font group on the Home page, then select the desired border style.
Create A Simple Formula
Excel can perform various types of math in addition to addition, which is only one of the things it can accomplish. To add, subtract, multiply, or divide your numbers, try some straightforward formulae.
1. Choose a cell, and then enter the equals symbol (=) there.
2. This instructs Excel that a formula will be present in this cell.
Enter a string of numbers and math symbols, such as the plus (+) and minus (-) signs for addition and subtraction, the asterisk (*) for multiplication, and the forward slash (/) for division.
Enter =2+4, =4-2, =2*4, or =4/2 as an example.
3. Hit the Enter key.
Run the computation with this.
If you wish the cursor to remain in the currently selected cell, you may alternatively hit Ctrl+Enter.
Filter Your Data
1. Choose the information you wish to filter.
2. Click Filter under the Sort & Filter group on the Data tab.

3. You may select a filter from a list that appears when you click the Filter drop-down arrow in the column header.
4. Clear the (pick All) check box in the list to pick items based on values. This clears all of the check boxes of their respective checkmarks. To see the results, pick only the values you wish to see and click OK.
Save your Work
1. Either hit Ctrl+S or click the Save button on the Quick Access Toolbar.
the Quick Access Toolbar's Save button
You're done if you've previously saved your work.
2. If you are saving this file for the first time:
a. Choose a location to store your workbook under store As, and then go to a folder.
b. Give your workbook a name in the File name box.
c. Press Save.

<----- Click Here to learn more